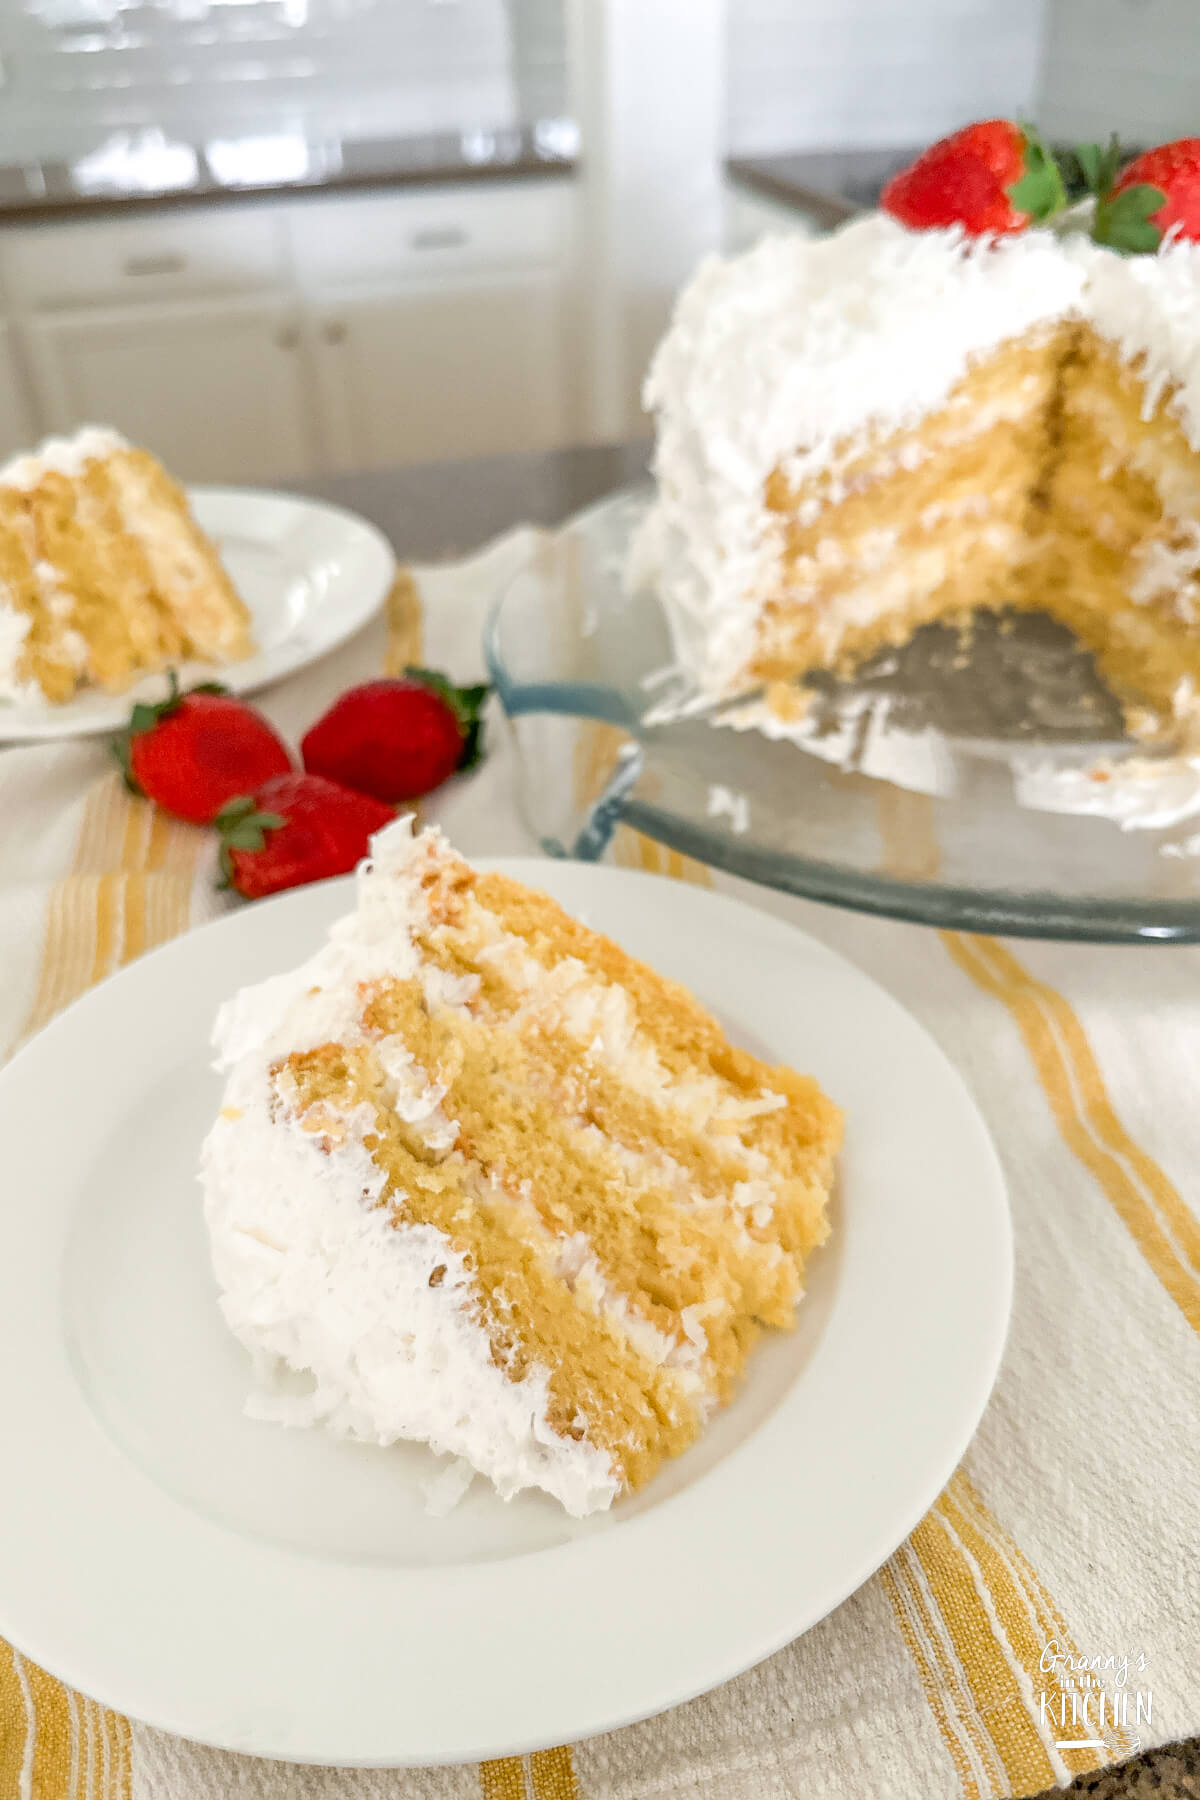
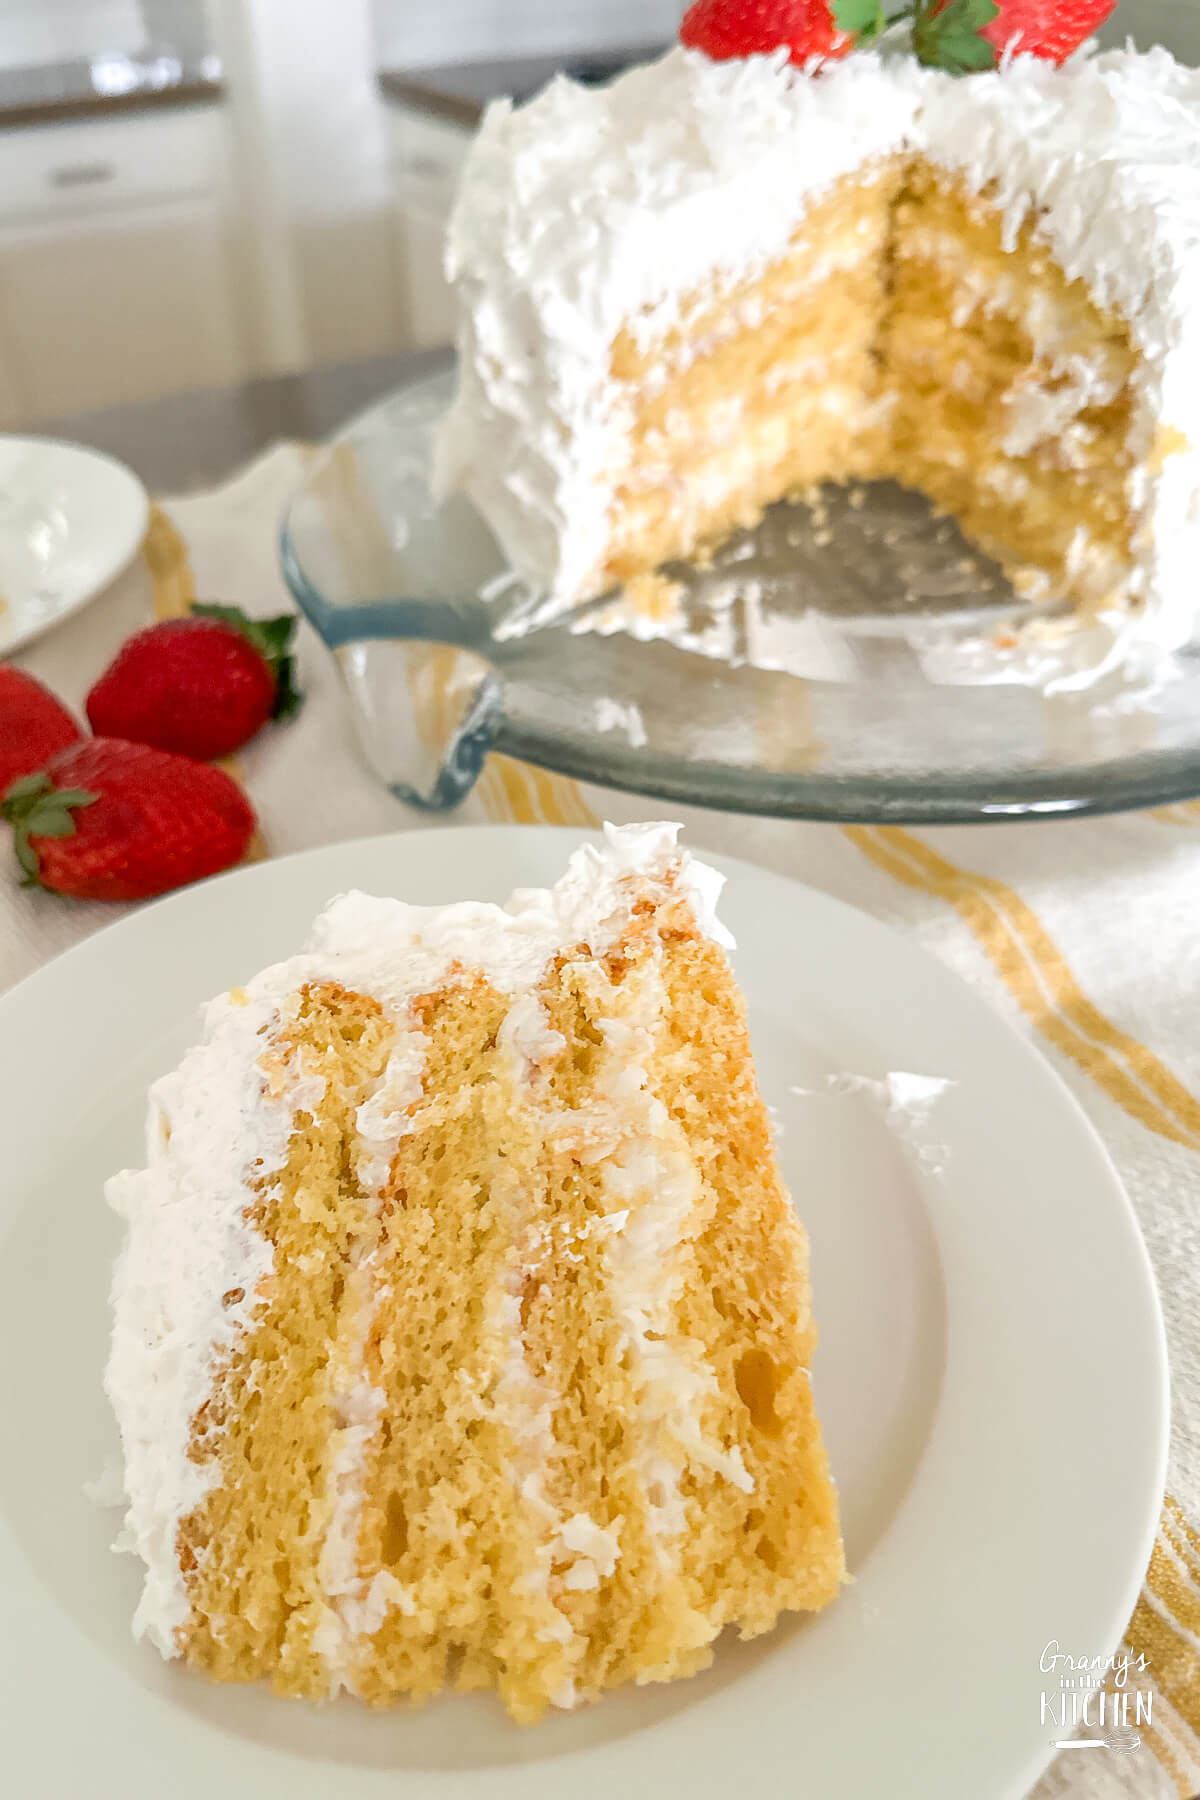
This old-fashioned coconut icebox cake is chilled for three days to achieve its signature moistness and rich flavor – and it is SO worth the wait!

Refrigerator Coconut Cake
This old-fashioned coconut cake requires a three-day chill in the refrigerator, but the wait is worth it! This allows the flavors to meld into an incredibly moist and delicious treat.
This recipe is a family favorite that has been passed down for many years, and is especially loved by my mom, Granny. The recipe card calls it an icebox cake. Icebox is what people used before refrigerators and as a child I occasionally heard people call their refrigerators iceboxes.
Back in the day, Granny often bought a frozen Sara Lee coconut cake to keep in the freezer and she would cut pieces when she had a craving for it. Coconut cake was a staple in my house growing up and you could usually find some in the freezer.
But occasionally Granny liked to make a homemade coconut cake and this recipe was her go-to.
It’s an easy-to-make dessert, starting with a box cake and simple ingredients, but does require refrigeration for three days to allow the flavors to meld.
During this time, the coconut filling soaks into the cake, creating a dense, sweet burst of coconut flavor. By the end of the refrigeration time, the filling has thoroughly soaked into the cake and made it totally different in taste and texture.
This cake’s standout feature is its rich coconut taste, found both in the creamy filling and the frosting. It is definitely a treat for coconut lovers!
–Sara
Ingredients
For your convenience in re-creating this recipe at home, we’ve included shop-able ad links to some of the products and supplies used. Read our disclosure policy here.
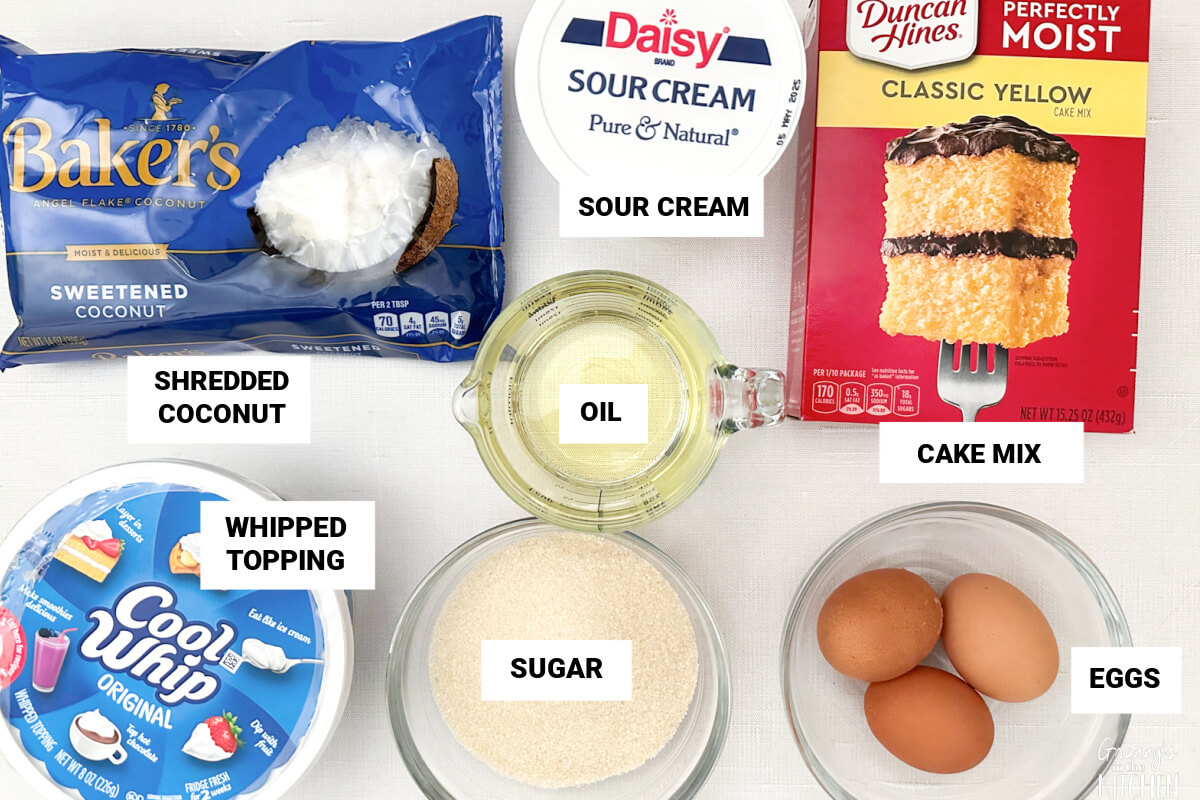
Cake Ingredients
- 1 box yellow cake mix (adjust other 3 ingredients below if your cake mix instructions say differently)
- 3 eggs
- 1/2 cup oil
- 1/2 cup water
Filling and Frosting
- 2 cups sour cream
- 12 ounces of sweetened coconut (found in baking section)
- 1 cup sugar
- 8 oz container of nondairy frozen whipped topping, such as Cool Whip
Helpful Kitchen Tools
Instructions
Cake Preparation
- Prepare cake mix as directed on the box, using two 8-inch or 9-inch round cake pans.
- Bake cakes as directed, then remove from oven and cool in pan for one hour.
- Remove cakes from pans and finish cooling on a wire rack.
- When completely cool, cut each cake in half, making four layers.
Filling Directions
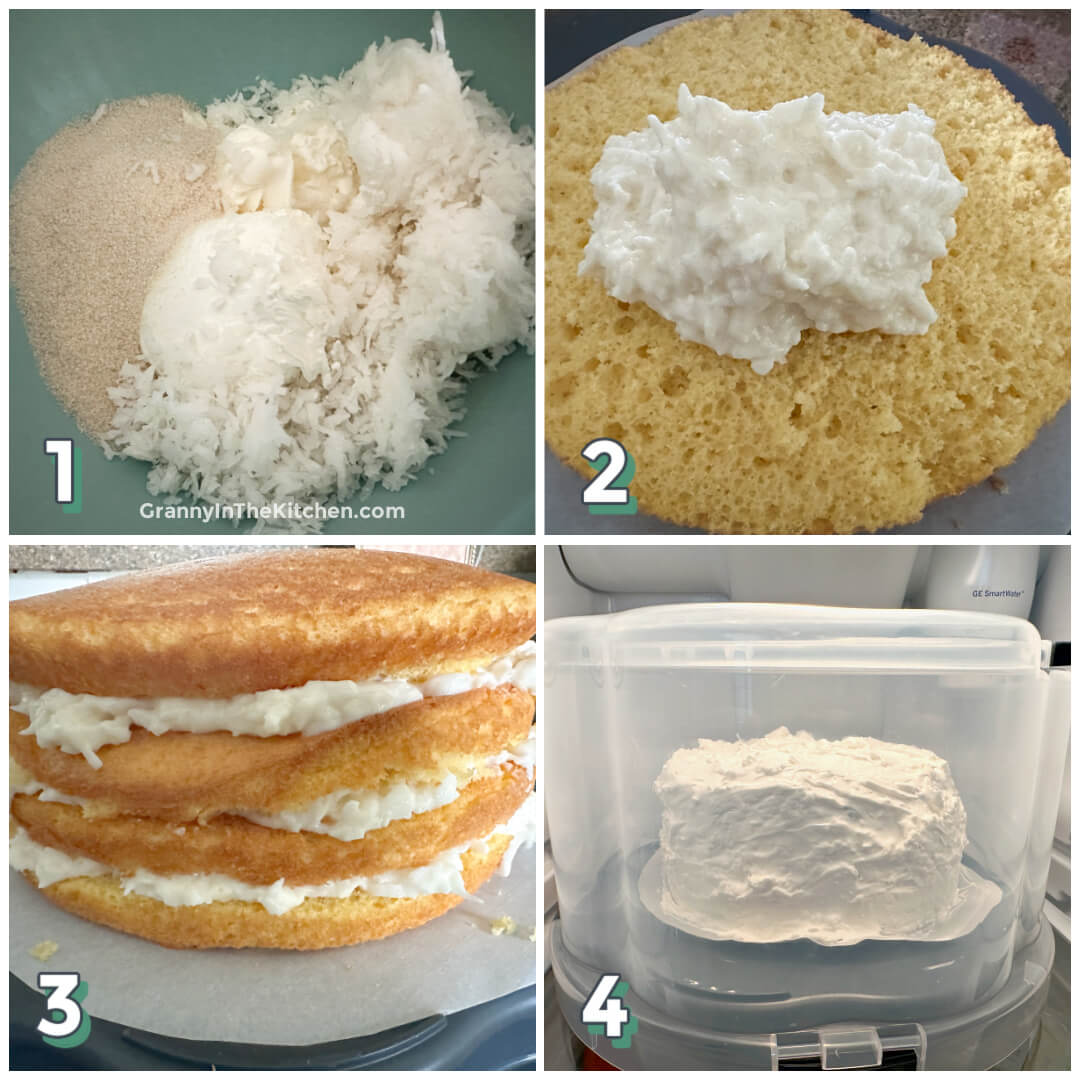
- Mix coconut, sour cream, and sugar thoroughly, it should be soupy.
- Set aside 1 cup of mixture to use in the frosting.
- Spread 1/3 of the remaining filling mixture on top of the first cake layer, and top with another cake layer.
- Repeat two more times, ending with a layer of cake.
Frosting
- Combine the reserved coconut filling with the non-dairy whipped topping.
- Frost the cake with the coconut frosting, sealing in all of the cake.
- Refrigerate the cake, covered, for 3 days before serving.
Prep Tips
- Variations – I followed the recipe using a yellow cake mix as instructed, but I think you could easily swap it for a white cake mix or try a flavored cake mix like banana, lemon, or strawberry for a fun twist.
- Whipped Topping – The recipe called for 3/4 of an 8oz container of Cool Whip, or similar whipped topping. If you want a thicker layer of frosting, feel free to use the entire container.
- Coconut – For the coconut, the recipe asked for frozen coconut, which I couldn’t find, so I used Baker’s coconut from the baking section instead, and it worked perfectly.
- Refrigeration Time – The recipe recommends refrigerating the cake for three days. I had planned on two days, but ended up waiting until the fourth day to cut into it. It was still great! I’d suggest refrigerating for at least two days, but no more than four.
- Cutting the Cake – I used a serrated knife to carefully cut each cake in two equal layers.
More Old Fashioned Cake Recipes To Try:
- Applesauce Date Cake
- Classic Pound Cake Recipe
- Chocolate Depression Cake
- Old-Fashioned Banana Cake
- Pineapple Carrot Cake
- Poor Man’s Cake
- Pistachio Chocolate Bundt Cake
- Hershey Bar Cake
- Oreo Dirt Cake
Coconut Icebox Cake Recipe (Printable Recipe Card)
If you tried this recipe and loved it too, please rate it! We’d love to hear what you think!
Want to Save This Recipe?
Enter your email & I'll send it to your inbox. Plus, get great new recipes from me every week!
By submitting this form, you consent to receive emails from Granny's in the Kitchen

3 Day Coconut Cake
Equipment
- Hand mixer
- 2 round cake pans 8 inch or 9 inch
- mixing bowl
Ingredients
Cake Ingredients
Filling and Frosting
- 2 cups sour cream
- 12 ounces sweetened coconut found in baking section
- 1 cup sugar
- 8 oz Nondairy frozen whipped topping such as Cool Whip, thawed
Instructions
Cake Preparation
- Prepare cake batter as directed on the box instructions, pouring into 2 greased 8-inch or 9-inch round pans.
- Bake cakes according to package instructions.
- Remove from oven and cool in pans for one hour.
- Remove cakes from pans and finish cooling on a wire rack.
- When completely cool, split each cake in half, making four layers.
Filling Directions
- Mix coconut, sour cream, and sugar thoroughly (it should be soupy).
- Set aside 1 cup of mixture to use in the frosting.
- Spread 1/3 of the remaining filling mix on top of the first cake layer, top with another cake round, then repeat two more times, ending with a layer of cake on the top.
Frosting Instructions
- Combine the reserved coconut filling with the non-dairy whipped topping (Cool Whip).
- Frost the cake with the coconut frosting, sealing all the cake.
- Refrigerate covered for 3 days before serving.
Notes
Nutrition
Pin our Icebox Coconut Cake on Pinterest:

You might also like: